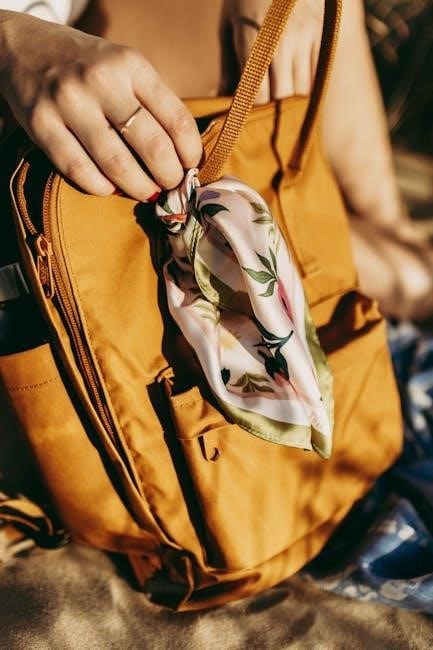
Discover the versatility of cross body bag patterns, perfect for travel and everyday use. These stylish designs offer practicality, with options for various sizes, pockets, and zippers; Free PDF patterns make sewing accessible for all skill levels, allowing you to create custom bags with ease. Whether you prefer minimalistic or feature-rich designs, there’s a pattern to suit your needs. Explore the world of cross body bag sewing with these adaptable and fashionable patterns, ideal for any occasion.
What is a Cross Body Bag Pattern?
A cross body bag pattern is a downloadable guide that provides measurements, templates, and instructions to sew a stylish and functional bag. These patterns are available as free PDF downloads, making them accessible to sewists of all skill levels. They often include customizable features like adjustable straps, pockets, and zipper options. Designed for practicality, cross body bags are perfect for everyday use or travel. The patterns are typically easy to follow, with step-by-step instructions, making them ideal for beginners. They allow you to create a personalized bag that fits your style and needs.

Why Choose a Free PDF Pattern?
Free PDF patterns offer a cost-effective and convenient way to create a cross body bag. They provide detailed measurements, templates, and step-by-step instructions, making them ideal for sewists of all skill levels. These patterns are easily downloadable and printable, allowing you to start your project immediately. Many free PDF patterns include customizable options, such as pockets, zippers, and adjustable straps, giving you the flexibility to tailor the bag to your preferences. Additionally, they often come with video tutorials or guides, ensuring a smooth sewing experience. Choosing a free PDF pattern is a great way to save money while creating a high-quality, personalized bag.
Popular Types of Cross Body Bags
Popular types of cross body bags include small, large, and convertible designs, each offering unique features. The small cross body bag is ideal for essentials like phones and cards, while the large version provides ample space for daily items. Convertible bags adapt to different uses, such as shoulder or waist bags. Other styles include the Celine-inspired trio bag, easy double zipper, and Gerbera cross body bag, known for its adaptability. These designs cater to various needs, ensuring a perfect fit for any occasion, whether casual or formal. Their versatility makes them a favorite among sewists and users alike.

Different Cross Body Bag Patterns Available for Free Download
Explore a variety of free cross body bag patterns, including small, large, and convertible designs. Perfect for travel or everyday use, these patterns cater to all skill levels and preferences.
Small Cross Body Bag Pattern
The small cross body bag pattern is perfect for travel or daily use, offering a compact design ideal for holding essentials like your phone and credit cards. This pattern requires minimal fabric, making it a quick and sustainable project. Designed for beginners, it features a simple construction with clear instructions. The small cross body bag is versatile, allowing you to customize it with various fabrics or add a zipper for extra security. Its lightweight and practical design ensures it’s easy to carry, making it a great addition to your DIY sewing projects. Perfect for on-the-go convenience.
Large Cross Body Bag Pattern
The large cross body bag pattern is ideal for those who need ample space for daily essentials or travel items. Designed with practicality in mind, it features multiple compartments and pockets for organization. This pattern is perfect for carrying laptops, tablets, or other bulky items while maintaining a stylish appearance. The adjustable strap ensures comfort, and the durable design makes it suitable for heavy use. With clear instructions, this pattern is accessible to sewists of all skill levels. Customize it with fabric choices, piping, or additional zippers to create a functional and fashionable bag for everyday use or special occasions.
DIY Celine Inspired Trio Bag
The DIY Celine Inspired Trio Bag is a stylish and versatile design that combines elegance with functionality. This pattern allows you to create a bag featuring three distinct compartments, perfect for organizing essentials. Inspired by high-end fashion, it offers a sophisticated look while being surprisingly easy to sew. The free PDF pattern includes detailed instructions and measurements, making it accessible to sewists of all levels. With options for adjustable straps and customizable fabric choices, this bag is ideal for everyday use or special occasions, offering both practicality and a touch of luxury to your wardrobe.

Easy Double Zipper Crossbody Bag
The Easy Double Zipper Crossbody Bag is a practical and stylish option for everyday use. Featuring two zippered compartments—one at the top and one on the front—it offers ample storage for essentials like your phone, keys, and credit cards. Designed with simplicity in mind, this pattern is perfect for beginners or those seeking a quick sewing project. The bag’s compact size and adjustable strap make it ideal for hands-free convenience. With clear instructions and a free PDF download, you can easily customize the fabric and details to create a bag that matches your personal style.

Convertible Crossbody Bag Pattern
The Convertible Crossbody Bag Pattern offers unmatched versatility, allowing you to transform the bag into multiple styles. Perfect for both casual and formal events, this design features an adjustable strap and a sleek, modern aesthetic. The pattern includes instructions for creating a bag that can be worn as a crossbody, shoulder bag, or even a clutch. With multiple compartments and a functional design, it’s ideal for everyday use. Suitable for sewists of all skill levels, this free PDF pattern ensures a professional finish with minimal effort, making it a must-try for anyone looking to expand their bag collection.
How to Use a Cross Body Bag PDF Pattern
Download and print the PDF pattern at 100% size. Assemble the pieces by matching markers, then cut fabric accurately. Follow the sewing guide for a professional finish.

Step-by-Step Guide to Downloading and Printing
Start by downloading the free cross body bag PDF pattern from a reliable source. Ensure your printer settings are set to “actual size” or “100%” to maintain accuracy. Print a test page to confirm scaling. Once printed, carefully cut out each pattern piece along the dotted lines. Use scissors or a craft knife for precise edges. Assemble the pattern by matching the alignment markers and taping the pieces together smoothly. Double-check the completed pattern for accuracy before cutting your fabric.
Assembling the Pattern for Sewing
Once printed, lay out your fabric and place the pattern pieces according to the instructions. Match the grain lines and alignment markers for accuracy. Cut out the fabric carefully, ensuring smooth edges. If your pattern includes pockets or zippers, prepare these components separately. Follow the sewing instructions to assemble the bag, starting with the lining and outer fabric. Press seams as you go for a professional finish. Topstitch visible edges to enhance durability and aesthetics. This step-by-step process ensures your cross body bag comes together seamlessly, ready for everyday use or as a stylish accessory.
Benefits of Using Free Cross Body Bag Patterns
Free cross body bag patterns offer cost savings and accessibility, allowing you to create custom designs without financial investment. Perfect for beginners, they provide an excellent way to explore sewing and design experimentation while crafting functional and stylish bags.
Cost-Effective and Beginner-Friendly
Free cross body bag patterns are a budget-friendly option for crafters, eliminating the need for paid designs. They are perfect for beginners, as they often include step-by-step instructions and video tutorials. These patterns allow you to experiment with different fabrics and styles without financial risk. Many designs are simple, requiring minimal materials and time, making them ideal for those new to sewing. The affordability and accessibility of free PDF patterns ensure that everyone can enjoy creating functional and fashionable cross body bags tailored to their preferences and skill levels.
Popular Variations of Cross Body Bags
Explore diverse cross body bag styles, from the Gerbera Crossbody Bag to the Perfect Cross Body Bag with pockets. These patterns offer unique designs, ensuring functionality and style for every preference, while catering to various sewing skill levels and aesthetic tastes.
Gerbera Crossbody Bag
The Gerbera Crossbody Bag is a popular and versatile design, loved for its adaptability and charming appearance. Made by many sewists worldwide, it suits various fabrics and personal styles. This pattern is relatively easy, making it a great choice for beginners and experienced crafters alike. Its compact size and practical design ensure it’s perfect for daily use or special events. The Gerbera Crossbody Bag pattern is available for free as a downloadable PDF, complete with clear instructions. It’s also complemented by video tutorials to guide you through the sewing process seamlessly. A stylish and functional accessory for any occasion, this bag is a must-try project.
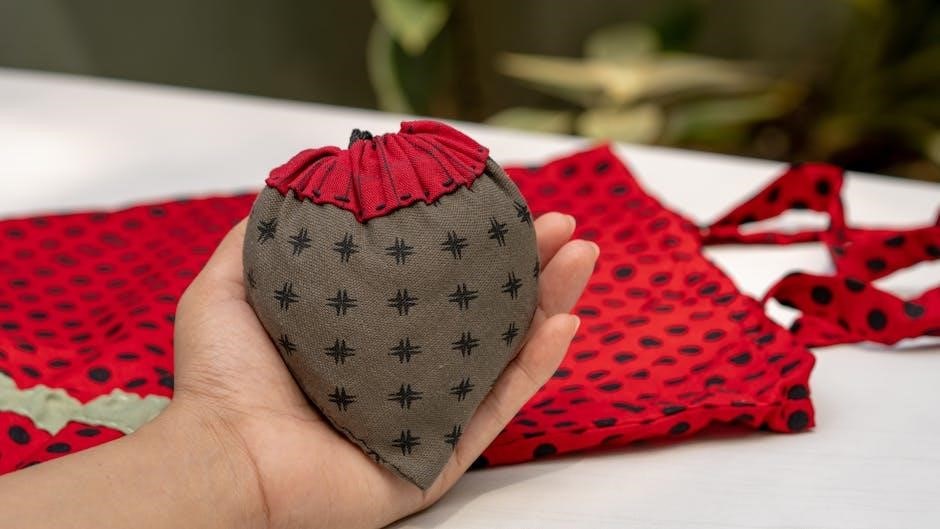
Perfect Cross Body Bag with Pockets
The Perfect Cross Body Bag with Pockets is a charming and functional design, offering ample storage for essentials. This pattern features multiple pockets, optional piping, and a stylish envelope closure. Available in three sizes, it’s ideal for various fabrics, including cotton canvas for a sleek look. The design is beginner-friendly, with clear instructions to guide you through sewing. Perfect for everyday use, this bag combines practicality with a trendy aesthetic. Download the free PDF pattern and follow the included tutorials to create a bag that suits your personal style effortlessly.

Accessories and Customization Ideas
Elevate your cross body bag with zippers, pockets, and piping for a personalized touch. Use leather, canvas, or vibrant fabrics to match your unique style and preferences.
Adding Zippers, Pockets, and Piping
Enhance functionality and style by incorporating zippers, pockets, and piping into your cross body bag. Add a front zipper for an extra compartment or use piping for a polished look. Pockets provide organization, while zippers ensure secure closures. These details elevate your bag’s practicality and aesthetic appeal, making it both functional and fashionable. Explore various techniques and materials to customize your design, ensuring your bag stands out with personal touches that reflect your creativity and skill.
With free PDF patterns, sewing a cross body bag is easy and rewarding. Start crafting your own stylish and functional bag today, perfect for any occasion!
Final Thoughts on Sewing Your Own Cross Body Bag
Sewing your own cross body bag is a fun and rewarding project, offering endless customization options. With free PDF patterns, you can create a bag that fits your style and needs. Whether you’re a beginner or an experienced sewer, these patterns provide clear instructions and versatility. From small, sleek designs to larger, multi-pocket bags, you can craft a piece that reflects your personality. The availability of free resources makes it accessible to everyone, allowing you to experiment with fabrics, zippers, and other details. Start sewing today and enjoy the satisfaction of carrying your handmade creation!